Find answers to the questions we get asked the most about Genie products andservices.
Need help? If you’re unable to find the answers you need in our FAQ’s, please speak with our tech support.
Call +44(0)1707 330541
Adding IP cameras through the LAN on an NVR via the Wish IP Tool.
Download Wish Ip tool via Genie website, install on a laptop or other PC that will be on the same network as the Wish IP cameras due to be added.
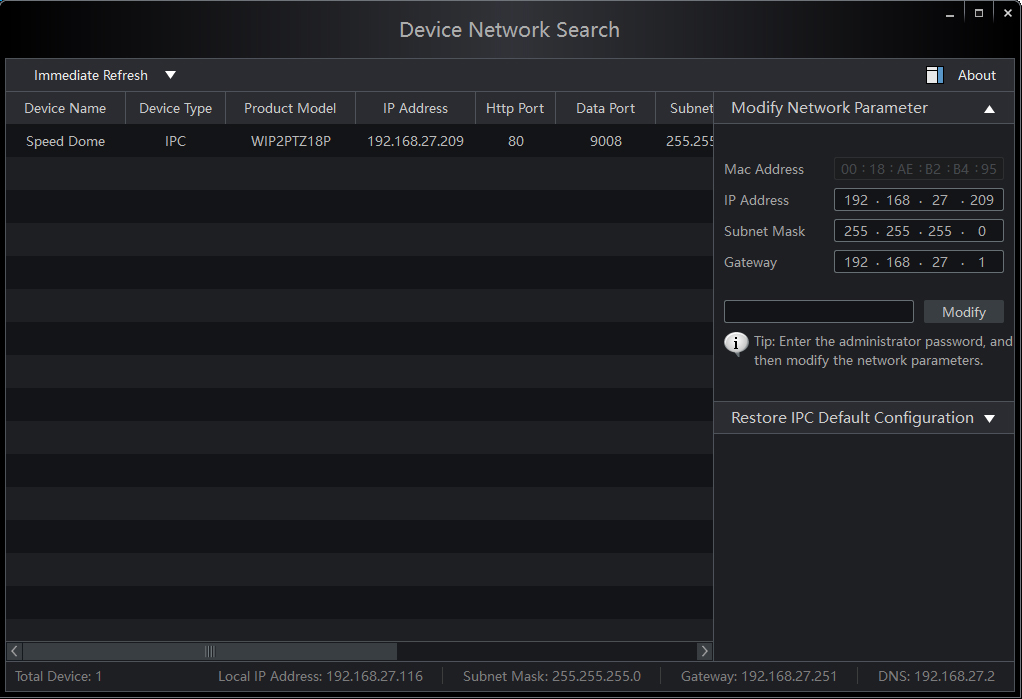
Run the Wish IP tool, preferably as administrator and with no firewalls running, the tool should auto search the network and find any devices any recognises.
Click on the camera you wish to amend and give the camera an IP address, Subnet mask and the gateway of the network, type In the password (default is 123456) and click on modify. (note: the IP address has to be in the same range as the network the device is going on).
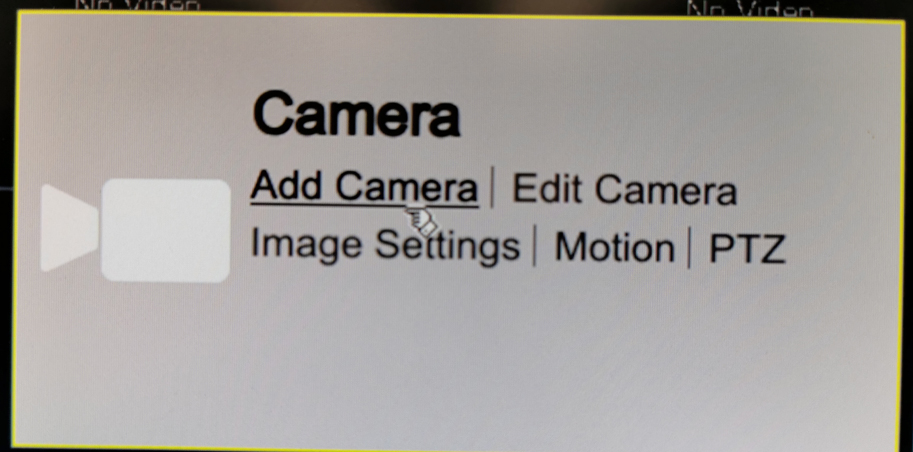
In order to add the camera via the NVR enter the ‘Add Camera’ option in the settings menu.
The NVR will automatically search the network for any devices on the network it recognises, select the camera(s) that you want to add to the NVR (these will be setup already as the IP address was set up earlier via the Wish IP tool) and click on ‘ADD’ at the bottom of the screen.
The cameras will connect and be viewable on the live screen.
Searching and backing up footage.
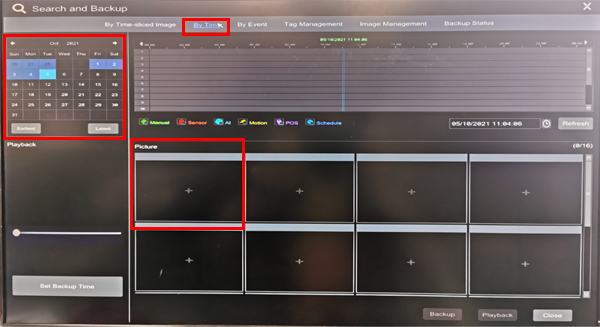
The easiest way to search for footage is via the TIME search.
Click the ‘Start’ button
Select ‘TIME’ on the top tool bar, Select the date and click on the ‘Plus’ sign under ‘Picture’ and select the cameras you wish to view.
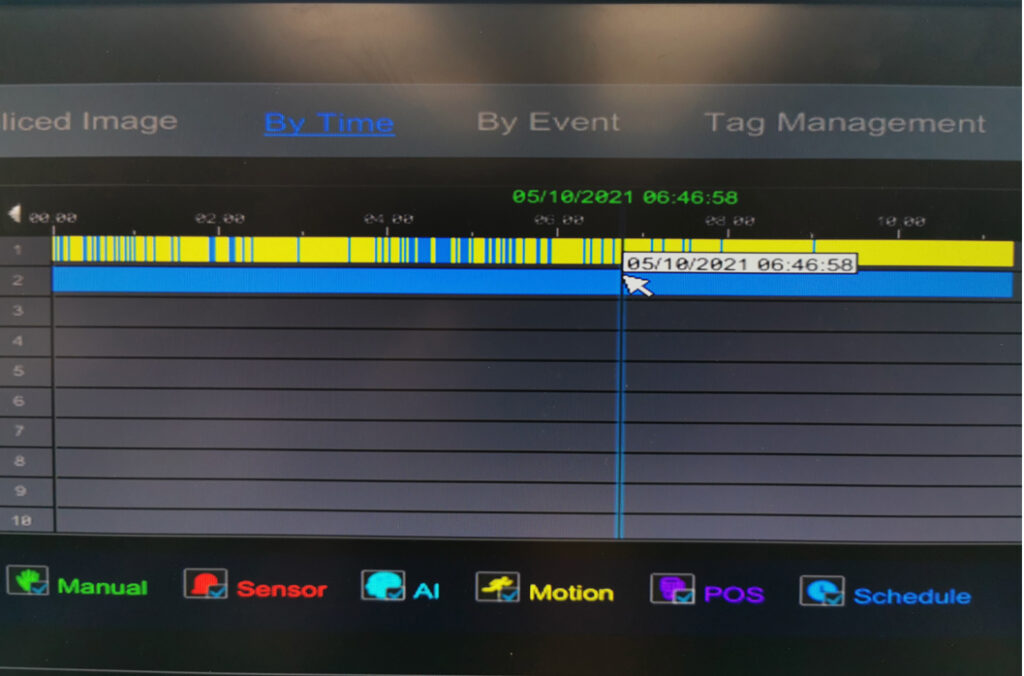
Use your mouse to select the time you wish to play back via the record bar and hit playback at the bottom of the screen.
Once in the playback screen you can view the playback in real time or slow it down./speed it up using the tool bar icons.
Once you have found the time that you want to back up you can click your mouse on the right start time on the bars right hand side and drag to where you want to stop the back up.
Plug in a USB flash drive, Hit the back up icon at the bottom of the page and select the USB device that’s connected.
Select the format you want to back up, if you choose .avi the videos will backup in the .avi format and can be played back with VLC media player or other media players that support the codec. If Private format is selected then the videos will be backed up in a .dat proprietary format and can only be played back using the RAPS player which will also be backed up.
Networking a DVR/NVR via P2P.
Make sure you have hard wired the DVR/NVR to a broadband connection.
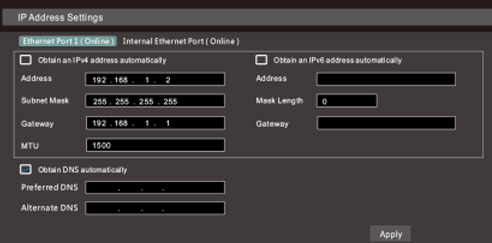
Head into the Networking section by using the mouse to click the ‘Menu’ button on the bottom tool bar
Once in the network menu, enter an IP address, subnet mask and gateway manually or tick the box to obtain IP address automatically (DHCP)
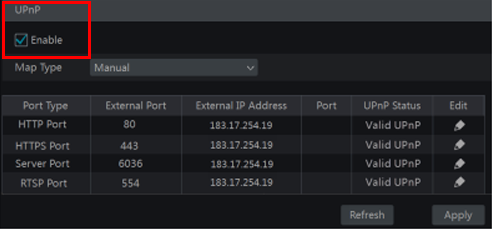
Once applied head into the UPNP section which is located on the top menu, tick the ‘enable’ box and apply the changes.
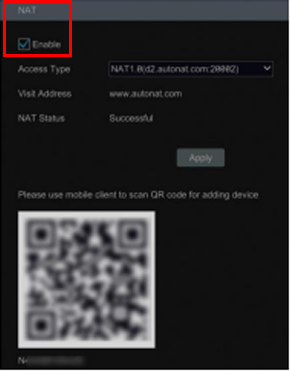
Enter the NAT section, again found on the top menu bar, tick the enable box and apply
On your smartphone download ‘Super Live plus’ Enter ‘Server List’ on the app and click on the plus symbol in the top right and select ‘Scan Code to Add’, scan the QR code found on the NAT page, and type in the password of the DVR/NVR when prompted.
If the unit is connected you should see a green WIFI symbol next to the device name, and you will be able to view live via the app.
Networking the Biometric Terminal with Unis.
AC2000SC:
Download UNIS-B-PLUS smartphone application via the Google Play store of the Apple store.
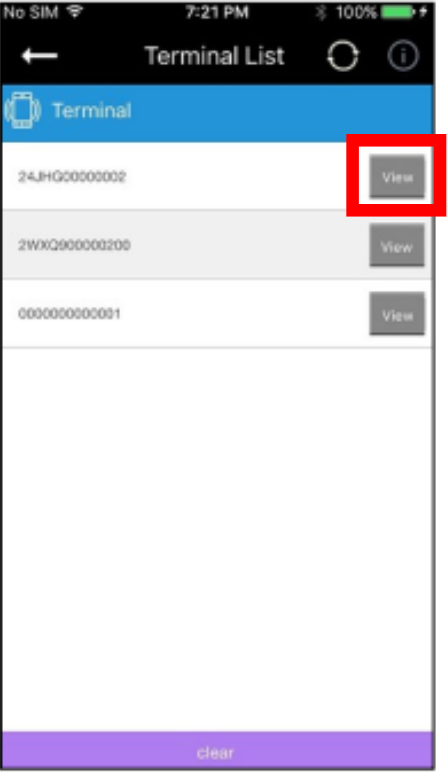
Open the app and click on ‘Search Peripherals’.
This will search via Bluetooth to find any terminals within Bluetooth range, once found click on ‘View’.
By default the user name and password are both blank, so click OK, and once into the terminal click on ‘Setting’, Select ‘EDIT’ on the top right and scroll down to the IP address section on the settings page. Select ‘EDIT’ on the top right and scroll down to the IP address section on the settings page.
Select ‘EDIT’ on the top right and scroll down to the IP address section on the settings page.
You need to give the terminal an IP address on the networks range (you can select DHSP which will auto assign the terminal an IP), you also need to give the terminal a unique ID number, by default this is set to ‘1’, but multiple terminals are being used then they need to all have separate ID numbers.
The other section which needs to be completed is ‘Server IP’. The IP address in this section needs to be the PC’s IP address that is running the Biomerge Server.
Once these sections have been completed and saved, the terminal should reboot.
If the terminals do not appear on Biomerge after this then turn off any firewalls on the PC, such as Windows Defender.
AC5000SC:
Networking is done via the keypad, press and hold the ENT button to get into the menu.
From here press number 2 to get you into the ‘Networking’ settings.
You will need to give the unit an IP address, ID number and server IP address as per the AC2000SC, however this is all done via the keypad, Press ‘1’ to get into the IP address section, press ENT to scroll through the boxes.
The terminal needs to be given an IP address on the networks range, or you can press ‘2’ to set the terminal to DHCP to auto assign an IP.
In order to type in an IP you will need to delete the current entry using F4.
Once changes have been made press and hold ENT to save the changes and exit that menu.
You will also need to give the terminal a unique Terminal ID number as well as input the server IP address (PC running Biomerge server) in the server IP section.
Once the networking has been set up press F4 to exit the menus and press ‘1’ followed by ENT when the option to save appears onscreen.
The AC5000SC will then reboot.
Biomerge2 server console isn’t functioning correctly and the system tray icon is orange.
Check the system has a functioning network connection.
Check the Net2 log on details are correct under Net2 settings.
Check the SQL Instance BIOMERGE is Running (located in Computer Management/services and applications).